Movement Practices Lab 1: Pose Detection with BlazePose
Overview of the Activity
In this activity, we will be learning to use BlazePose, a software library that finds joints and other body landmarks in an image or video. We will use the p5.js library for creative coding to control it.
This is a programming-intensive activity, but don’t worry if you don’t have coding experience. We have done it on the first day of class with many students with a range of prior coding experience, from none to lots. Just remember to ask for help when you are stuck, so that this is a exercise in learning and not in frustration.
Introduction to BlazePose

BlazePose is a software library that estimates the pose of a person in an image or video. It employs machine learning to compute the probable positions of 33 body landmarks, or skeleton keypoints. These keypoints are located at major skeletal joins (e.g. wrists, elbows, shoulders, knees) and facial features (eyes, ears, and mouth).
BlazePose was developed by Google. It can be used with programs written in JavaScript, or Python. In this activity, we will use the JavaScript version.
More details on how BlazePose works, including a list of keypoints, are in this blog post.
p5.js is a JavaScript library with the goal of making coding accessible to artists, designers, educators, and beginners.
p5.js is inspired by — and very similar to — Processing. If you know Processing, many of the concepts in p5.js will look familiar (and vice versa). Unlike Processing, p5.js uses JavaScript instead of Java, and runs in a web browser (including on mobile devices) instead of in a dedicated IDE.
Activity Steps
In this activity, you will use the browser version of p5.js, which is maintained by the Processing Foundation. We recommend running it in Chrome, (we can try other browsers in class).
You will run our class “starter kit” project that uses BlazePose (it’s based on, and similar to, public demo code for BlazePose). You will become familiar with the browser interface to p5, and you will modify the program.
You will create an account on the P5 Editor site, so that you can create and save versions of the program to make your own projects using BlazePose.
A. Explore BlazePose
Run BlazePose in your browser by opening the following URL. Chrome works better (runs at a higher frame rate) than Safari.
Note: The browser may request permission to use your camera. Grant it.
Note: If your computer has multiple cameras, Chrome may choose the wrong one. See the Troubleshooting section at the end of this document.
Stand back from the computer so it sees your whole body.
Questions:
Q. Try out different poses. What is BlazePose good at? What can’t it do?
Q. What frame rate (fps) does your computer report? (This is the number at the upper left corner.) Send this in Slack. Q. What effect does scoreThreshold have?
Take notes to answer in the homework assignment.
Now you’ve got BlazePose running. Try it, and explore how well it works with wherever your laptop camera is aimed. Re-explore some of the earlier questions and think of other ones.
Try out different poses. What is BlazePose good at? What breaks it?
If your physical situation allows, you can also try different backgrounds.
Note your findings, to answer in the homework assignment.
B. Run your own copy
- Create an account on https://editor.p5js.org. You can also sign in with your GitHub or Google account.
- Visit the URL https://editor.p5js.org/osteele/sketches/NzEo8v0Qo
- Press the Run button ▶︎, grant camera permissions, and verify that you are able to run BlazeNet. You should see an image from your WebCam. After a few moments, this should be overlayed with circles and lines that indicate the detected bodypart landmarks.
- Select the menu item File > Duplicate to make your own copy of the project, that you can modify. Note: This is the File menu inside the browser window, not Chrome’s File menu.
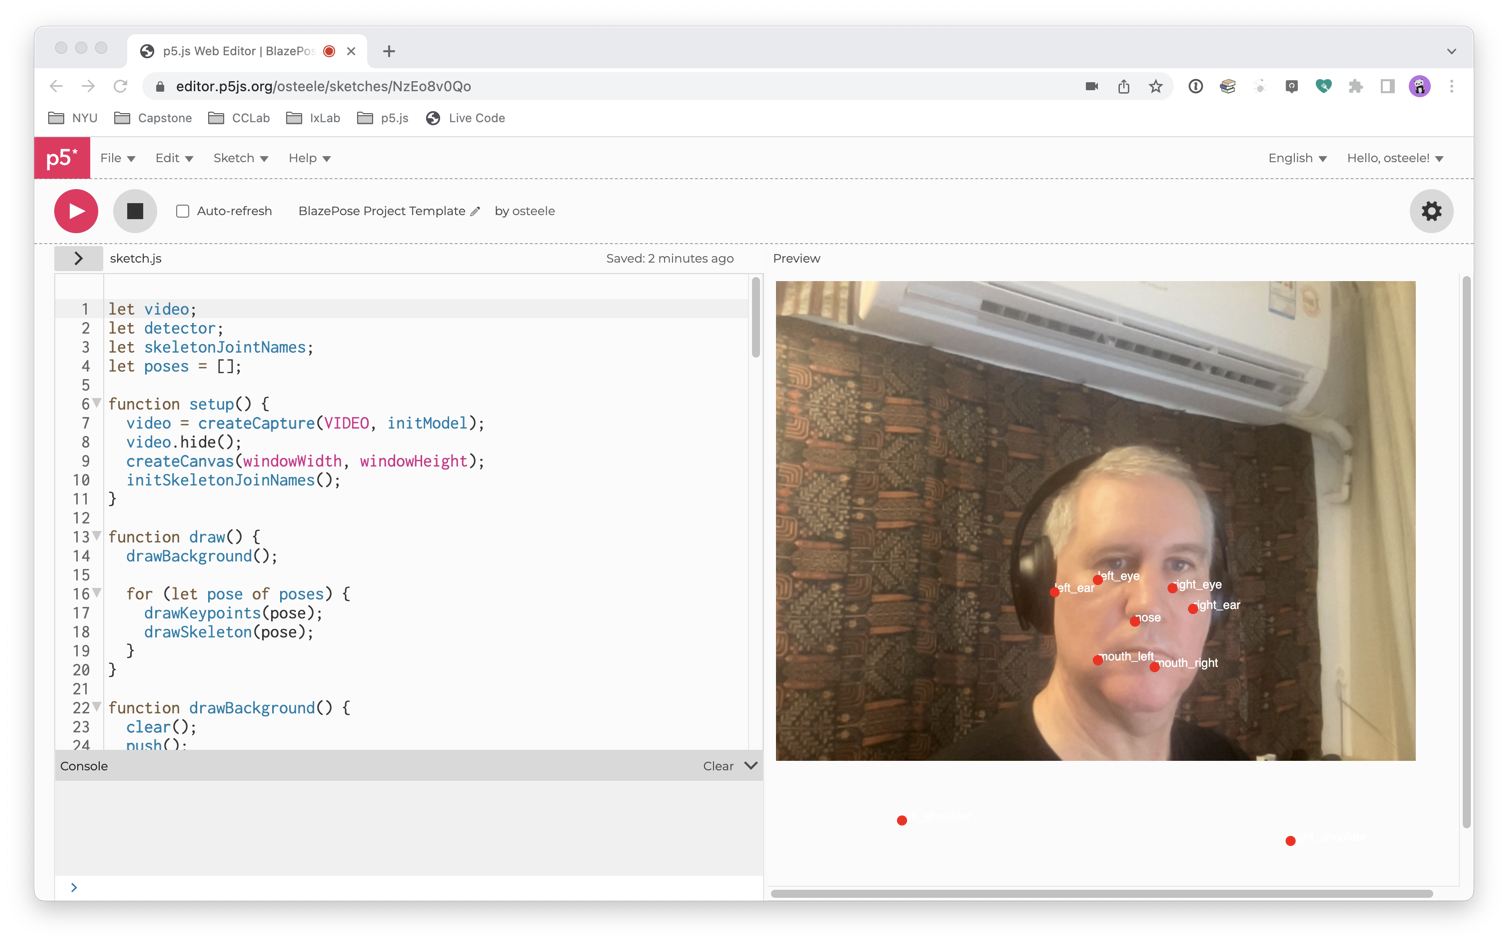
You should see something like this. Note the red circles and white text on top of the image. Move further away from the camera in order to see the estimated pose for your whole body.
Tips: To run the sketch, click on the Run icon ▶︎. To stop, click on the stop button ⬛️. To restart the sketch while running, click the Run icon again.
Note: If you would prefer to develop in Visual Studio Code, Atom, or another code editor running on your own computer, you can use the File > Download menu item to download the project files to your own computer and edit them there. Note that this is the File menu within the browser window, not Chrome’s File menu.
C. Make a change
Objective: verify that you can create a new project and change the behavior and appearance of the BlazePose starter kit program.
- Find the line
ellipse(x, y);. Change one of the10s to a20. - Reload the sketch, by pressing the ▶︎ button again, to test your changes.
D. Save your change; create a new project
Objective: Share your project
- Save your change.
- The p5 interface will ask you to create an account so that you can save your projects.
- Put the URL of your new project into Slack.
E. Make more changes:
Objectives:
- Learn your way around the BlazePose project by making modifications.
- Get some ideas for BlazePose projects.
- Build up your own systems for remembering how to find reference material.
- Practice using p5.js (and maybe JavaScript) documentation.
E1: Modify the keypoints Display
Make use of at least one p5.js function that is not used in the original code base, to spice up the visual display. Suggestions: use other shapes. Going beyond: use vertex, place images
BlazePose working tip: Make time to work with others in class, as it is easier to try out changes when one person is far from the camera and one is modifying the code. – Sorry, Spring 2022 class!
General working tip: Make small changes, test often, and save often!
Send a screenshot to Slack.
E1: Experiment with Confidence Levels
The code as distributed draws only keypoints with a certain confidence level. Change the confidence level to a different number. Does that have a noticeable effect?
F. Make even more changes:
F1: Modify the Skeleton Display
- The starter code draws the BlazePose bones (“skeletons”) as thin red lines. Make them thicker. (You can also try different colors.)
- Optional advanced version: Set the color or thickness of the bone depending on the confidence score of the connected keypoints.
F2: Leave a Trace
- Find the line in the sketch:
image(video, 0, 0);
“Comment it out” by prefixing the line with two forward slashes //. This disables it — it tells the computer not to execute it — but it leaves the code in a form where it can easily be enabled again.
// image(video, 0, 0,);
What do you expect to change?
Now view the program in the browser. What changed?
- Right above (or below) the line that you commented out, add this line:
background(0, 0, 0);
This draws the background on each frame. The background is drawn with a color composed of three lights of color red, green, and blue (R, G, and B). In this case each light intensity is set to 0, so the background is drawn in black.
We could have just written background(“black”). The rgb notation is a better setup for:
- Replace the background line with:
background(0, 0, 0, 5);
The background is drawn with semi-transparent black, that lets most of the background show through. This color is 0.05 opaque, which is 5% opaque or 95% translucent.
F3: Try 3D (Advanced)
Note that in addition to the pose.keypoints array, there is another array pose.keypoints3D . The objects in this second array have x and y properties like those in pose.keypoints, but they also have z properties. You can use the x, y, and z with a WebGL canvas to display the pose in 3D. Or, you can use the z value in other ways, such as to control the size or color of a point.
Troubleshooting
General
Whenever you run into an issue with a web application that you are developing, you should open the Developer Console and look for warnings. This page has instructions for opening the console on Chrome (and other browsers).
The following warnings are expected, and you can ignore them. You can distinguish these from other warnings because they are all about URLs whose names end in .map not being found (”HTTP error: status code 404”).

Site Doesn’t Have Permission to Use the Webcam
If you clicked “no” when the site asked to use the camera, you will need to go into Settings to give it permission. Follow these instructions.
BlazePose Is Using the Wrong Webcam
If your computer has multiple webcams connected, Chrome may choose the wrong one. This can be the case if you have installed a virtual webcam such as Snap Camera or OBS, or have connected your computer to an external webcam or a display that includes one.
If this is the case, follow the instructions here to direct Chrome to use the appropriate camera. Then refresh the page.
Resources
- openprocessing.org
- P5 reference (also available through the p5 browser interface)
- Some P5 cheat sheets:https://bmoren.github.io/p5js-cheat-sheet/https://bmoren.github.io/p5js-cheat-sheet/zh.html (Chinese comments)
- https://www.dropbox.com/s/ittkfaw3987u45r/Cheetsheet.pdf?dl=0